Product Manual
Master every control. Explore the complete feature set of your VINTROLUX.
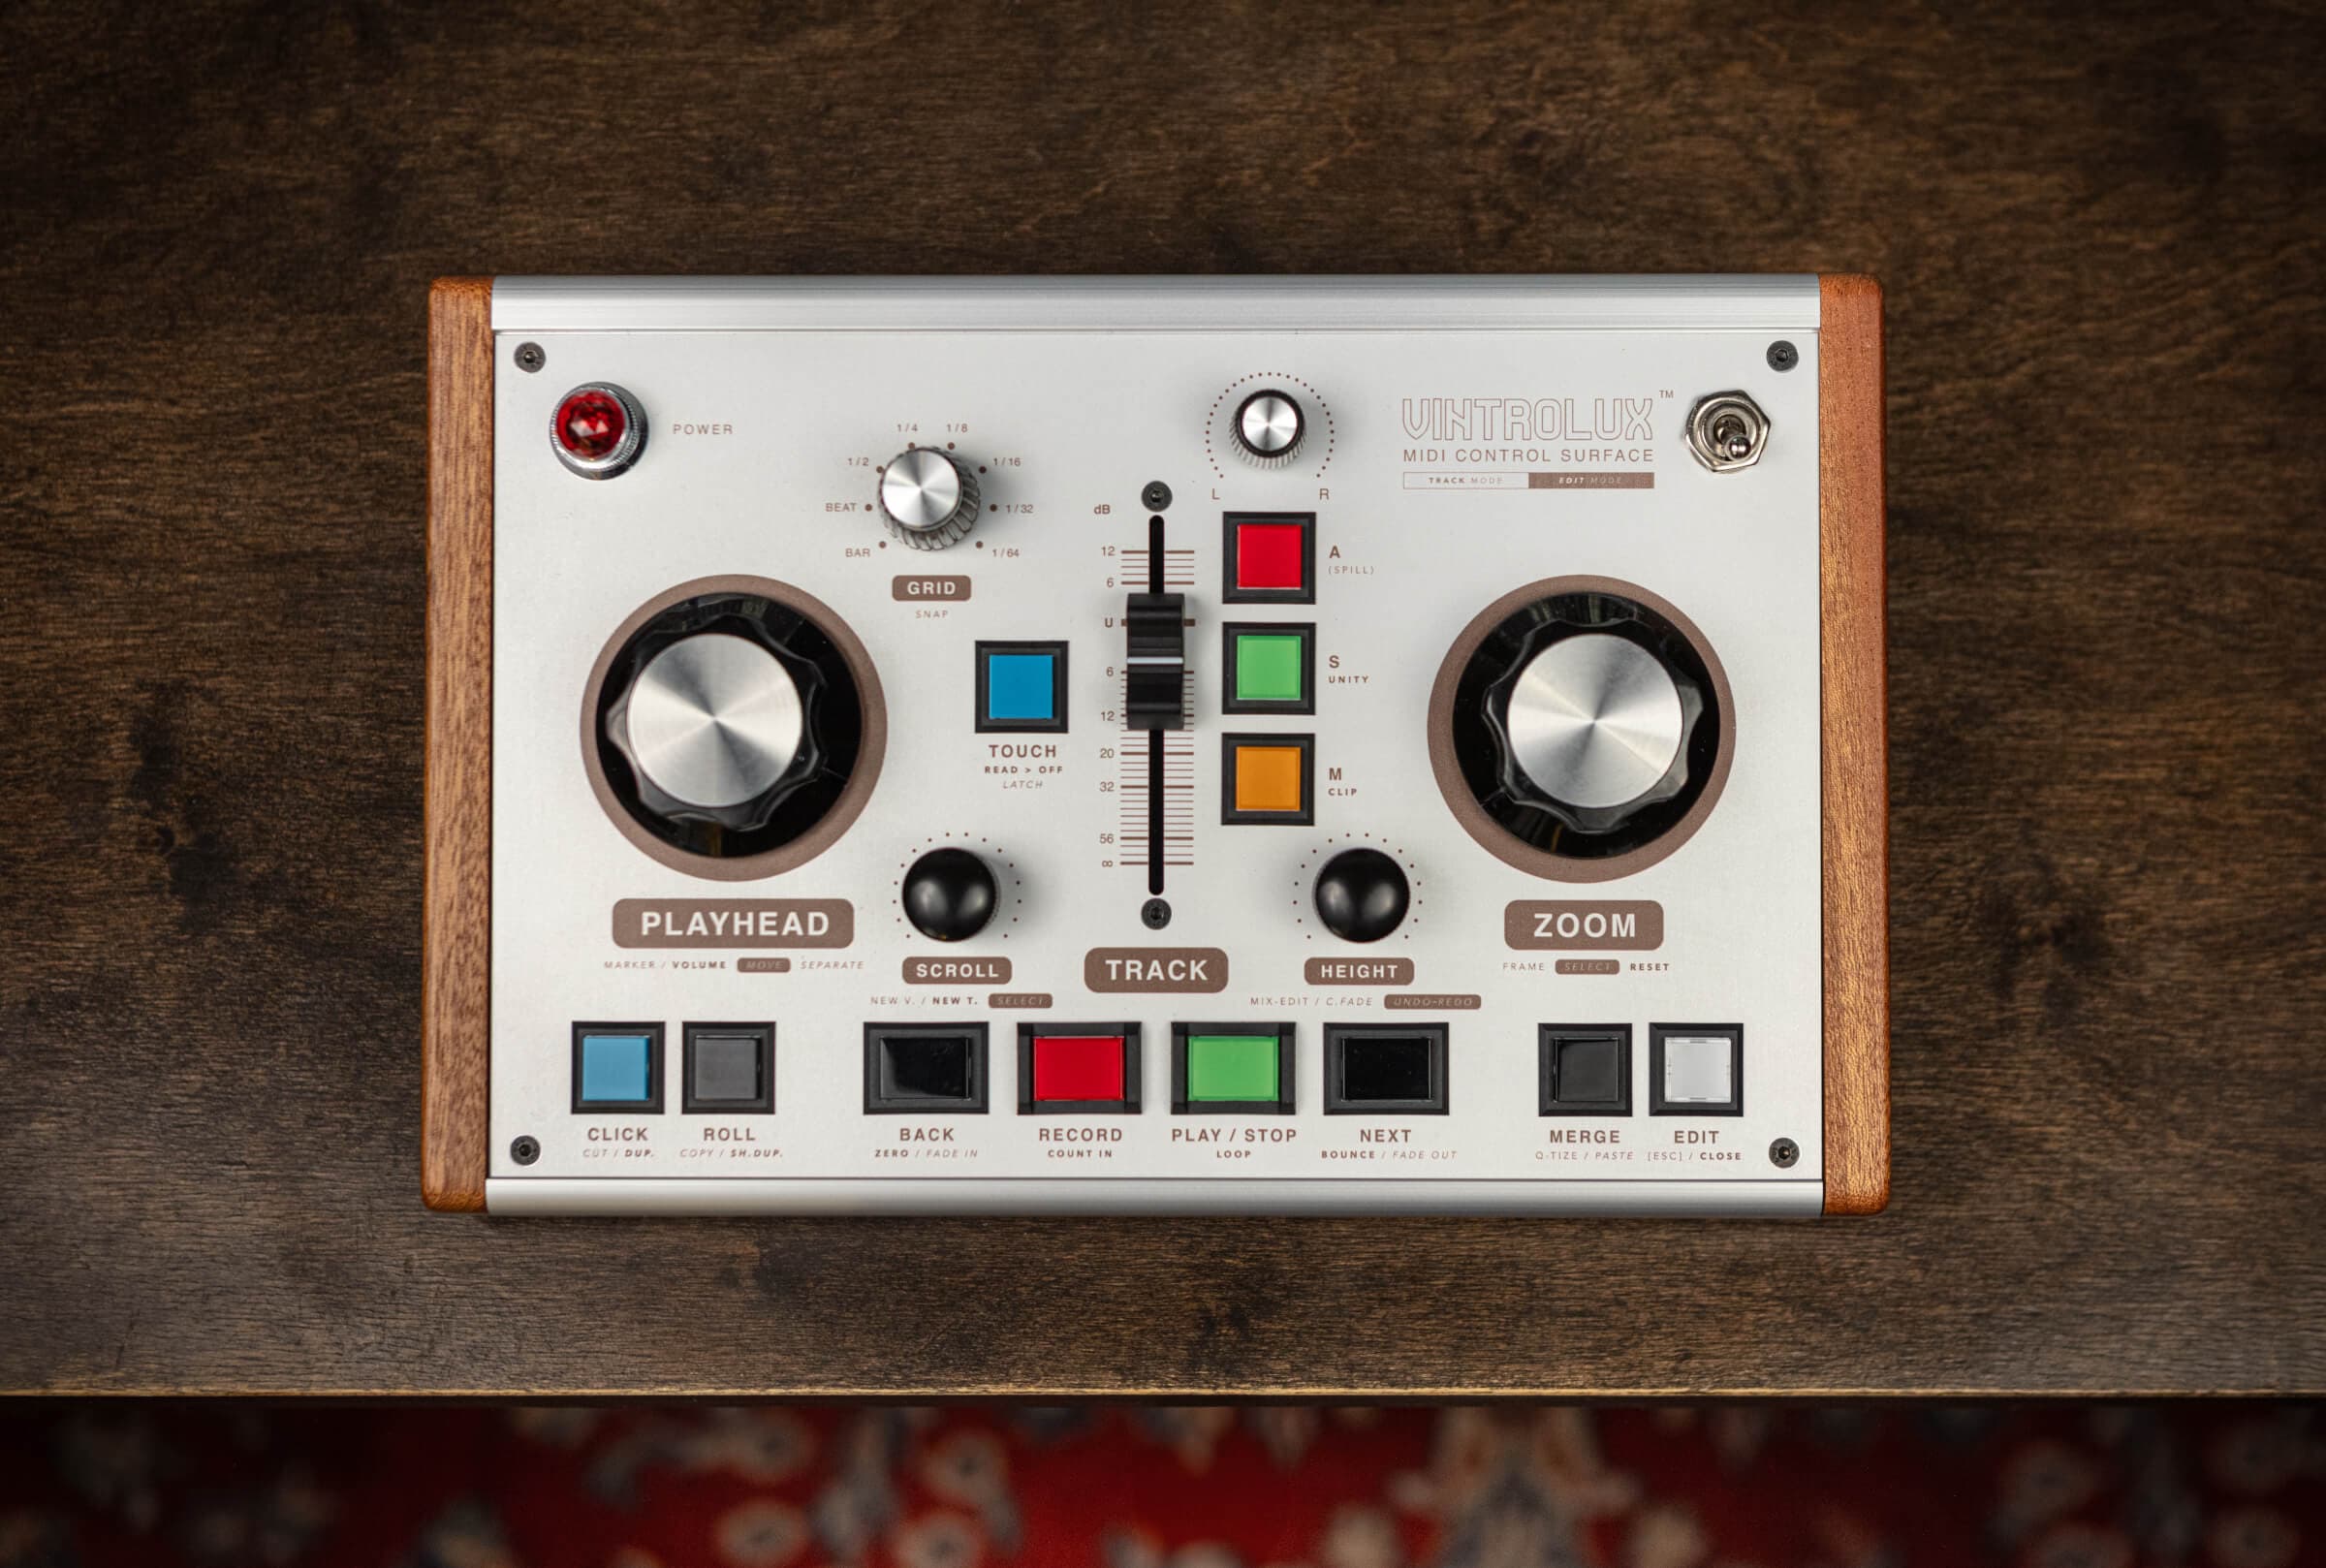
In LUNA and Pro Tools, the VINTROLUX has three modes, navigated with the EDIT button.
Track Mode
Built for moving fast while staying in the flow during tracking with transport, track, and UI controls. Toggle click, pre-roll, and MIDI merge. Perform track level automations.
Edit Mode
Deeper editing: shaping, trimming, fading, and rearranging clips on the timeline.
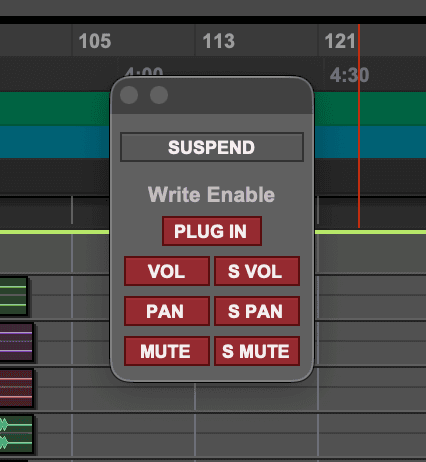
Rack Mode
Cue, Send, and Plug-In control. Perform Send automations.
Ride Send levels and scroll through Sends.
Ride Cue / headphone levels.
Control Plug-In parameters.
System Requirements
Mac with USB-C. Use the included cable. Many USB-C cables don't carry enough power.
One-Time Setup
Follow the instructions below the first time you connect. Afterwards, the DAW will automatically detect the VINTROLUX.
NOTE: The USB-C connection on the back is orientation-specific. If the device doesn't power on, try flipping the cable and reconnecting it.
NOTE: The first time you update firmware, macOS may ask “Allow accessory to connect?” and show the device as “NXP SemiConductors Inc SP Blank RT Family.” That's just the VINTROLUX in update mode. Click Allow and you won't be asked again.
Volume Control Setup
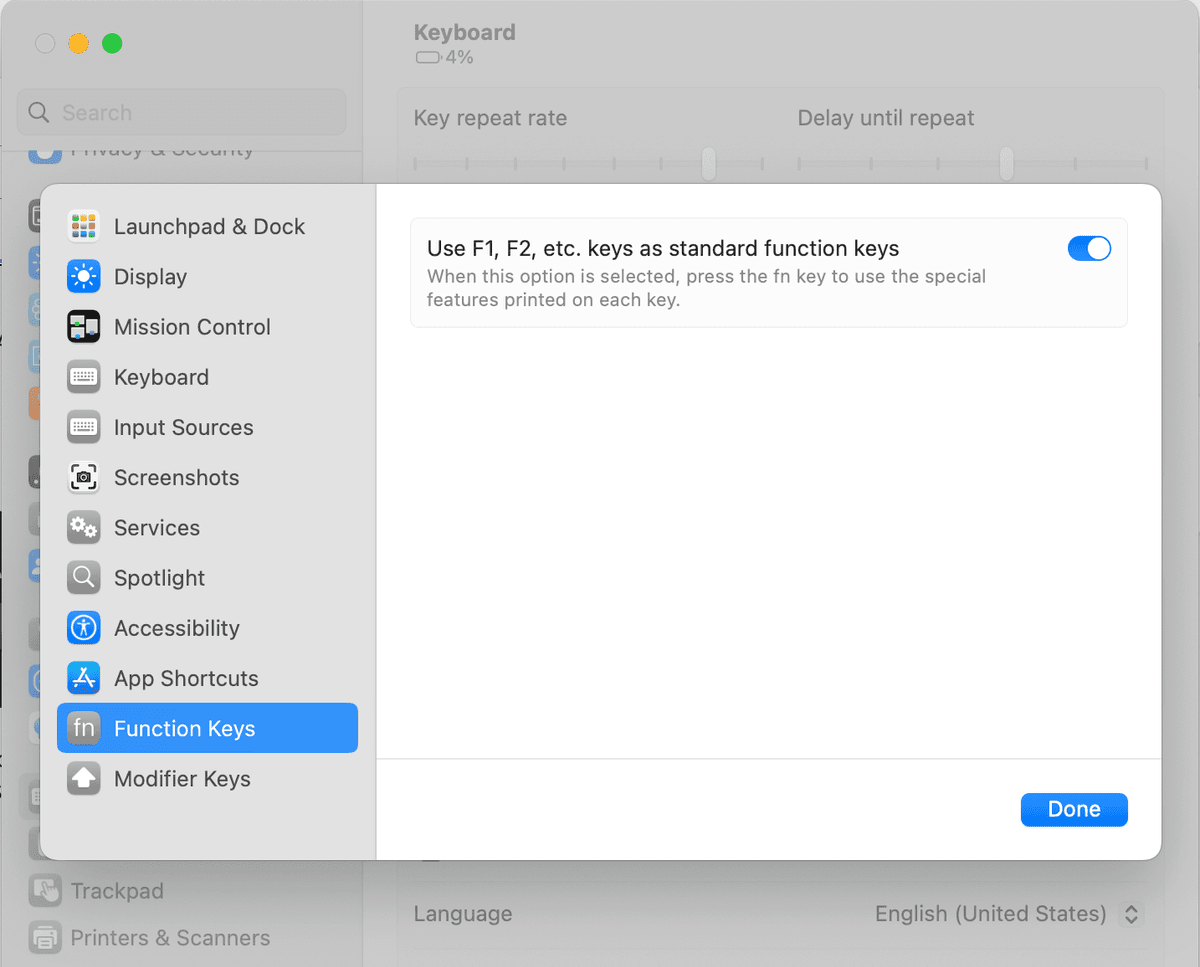
Enable Function Keys
Enable this setting to allow the Volume knob to control UAD Console volume.
- 1
Go to System Settings → Keyboard → Keyboard Shortcuts → Function Keys
- 2
Enable "Use F1, F2, etc keys as standard function keys"
NOTE: The first time you connect VINTROLUX, MacOS Keyboard Setup Assistant may appear. Simply close it to continue with the setup process.
LUNA Setup
Controller Configuration
- 1
Power on VINTROLUX
- 2
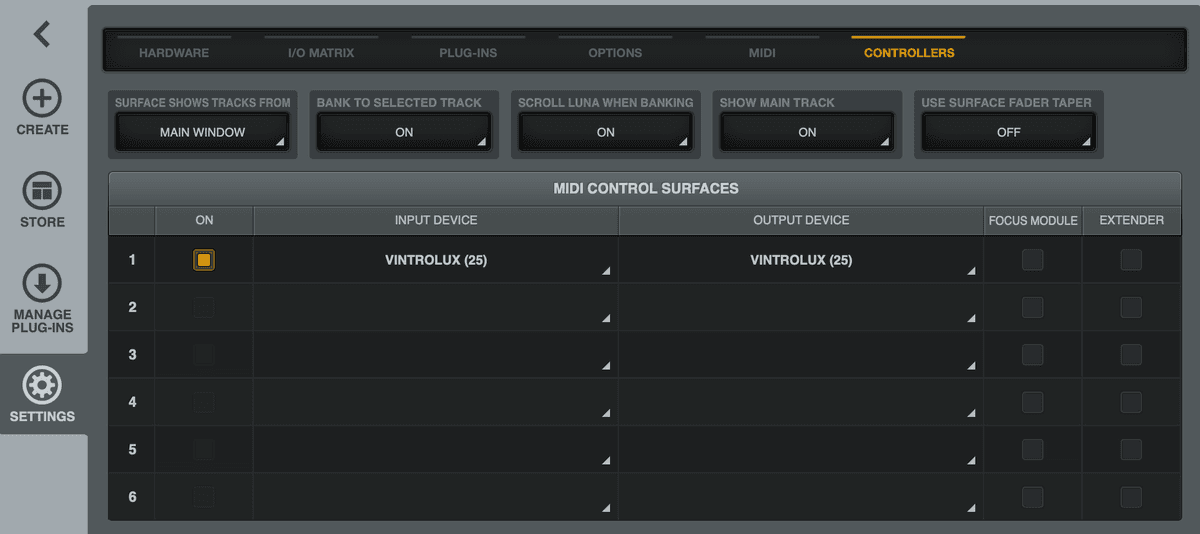
In LUNA, go to Settings → Controllers
- 3
Under MIDI Control Surfaces, select VINTROLUX for Input and Output Devices, and check the 'On' box.
MIDI Merge Button Setup
- 1
Go to top menu, LUNA → Keyboard Shortcuts → Customize
- 2
Search for "midi merge"
- 3
Set keyboard shortcut to F8

Pro Tools Setup
Controller Configuration
- 1
Power on VINTROLUX
- 2
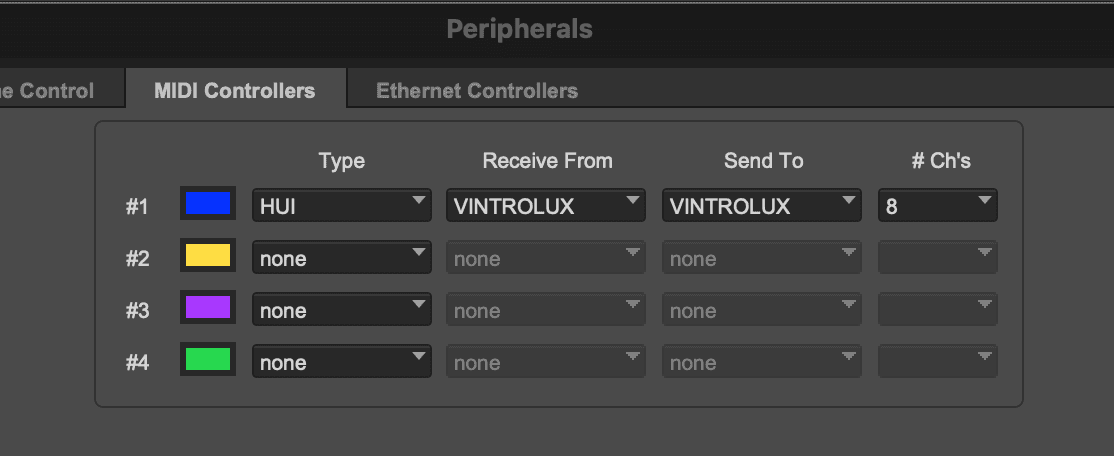
Open Pro Tools and go to Setup → Peripherals
- 3
Select the MIDI Controllers tab
- 4
Set Receive From and Send To ports to VINTROLUX
- 5
Click OK to save your settings
Enable Automation
- 1
Go to Windows → Automation
- 2
Enable the automation modes
- 3
Automate volume, mute, and pan from your VINTROLUX.
Customize
Make it your own
Everything you see in this manual is how the VINTROLUX is set up out of the box. If you'd like to change what a button or knob does, the Configurator is a free web tool where you can pick from a long list of actions and assign whatever you want to each control. It also includes ready-made setups for non-music apps like Lightroom and Premiere.
The VINTROLUX holds up to six custom setups onboard, so you don't need an account or an internet connection to switch between them. LUNA, Pro Tools, Logic, and Ableton are recognized automatically when you open them. To use one of the non-music app setups instead, pick it from the swap menu in the Configurator and it loads onto the device.
Open the ConfiguratorNOTE: The Configurator finds your VINTROLUX automatically as soon as it's plugged in. Nothing to click, nothing to set up. Your custom setups are stored on the VINTROLUX itself, so they stay put when you unplug it, turn it off, or update the firmware later.
Using the VINTROLUX
Auto DAW Sensing
The VINTROLUX features intelligent DAW detection that automatically recognizes which digital audio workstation is currently active. When switching between LUNA, Pro Tools, Ableton, or Logic Pro, simply close one application and open the other. No manual reconfiguration is required. The controller seamlessly adapts its control mappings to match the active DAW, ensuring optimal workflow continuity across your production environment.
Keep DAW in Focus
Most communication between the VINTROLUX and the DAW is handled via MIDI, meaning the controls continue to work even when LUNA is running in the background. However, some features rely on keyboard emulation, which imitates keyboard shortcuts, and will only work if LUNA is the active window. To avoid unintended key presses in other applications, it's recommended to keep LUNA as the active window while using the VINTROLUX.
Tips & Tricks
CANCEL / ESC
Double-press the EDIT button to send CANCEL / Escape, which is great for exiting text fields and putting the focus back on the playhead. For example, if the cursor is in the plug-in search box, or new track name box, double-pressing the EDIT button gets you out of those things and back on track. Double-pressing also quickly deselects a selection on the timeline.
TOUCH Button
Single button track automation mode selector. First press sets mode to TOUCH. Press a second time for LATCH. Press and hold once to get back to READ and a second time for OFF.
ZOOM Reset
Hold down the Zoom knob and it will reset the Zoom / Grid sync. Sometimes they fall out of sync. If you notice the zoom isn't going as far as you'd expect, a Zoom Reset will get you back on track!
Volume Control
Hold the Playhead knob to adjust the Apollo's output volume; press to mute. Hold again to exit. Requires the one-time Volume Control Setup.
All Functions A-Z
Quick reference guide to all VINTROLUX functions in alphabetical order